 Christmas Mega Sale – Enjoy Up to 50% OFF on Every Plan!
Online businesses have always been on a never-ending ride. Amidst evolution, we have seen significant changes in the search engine’s ranking factors & needs. WordPress website speed optimization is one of those recent needs.
Users instantly reject slow websites with even a one-second delay in the loading time. That ends up in increased bounce rates, fewer conversions & low traffic.
You see, one factor (here slow web page loading) affects everything.
Sure, you don’t want to create a website to slip away profitable sales and ROI. Do you?
So, you need to ensure to fulfill the user’s query in the quickest possible time.
This is what our well-known WordPress Speed Optimization Plugin is designed for. It works on automated check-off configurations & a quick save-change system to help you make the site faster with fast yet accurate results.
Let’s roll the music, it’s time to introduce our champion plugin for all those WordPress Business Owners out there. W3Speedster is the name you can call it.
Let it help find a sweet home in your WordPress and it will guide you through problems to success.
It doesn’t believe in a one-fits-all approach. Rather it provides customized help to make sure your WordPress skyrockets speed and performance.
How To Get Desired WordPress Performance Optimization Results with W3speedster?
Seeking an automatic system to speed up your WordPress site? W3speedster is an automatic speed optimization plugin ideally made for you.
Recommended Settings for Optimization:
- You can choose to do speed optimization through our recommended settings.
- After installation, locate the recommended settings on the top of the screen displaying the W3speedster Logo.
- Once you enter into the settings, activate them.
- Now your website will optimize based on the prior settings done in the plugin.
Take a look at how W3speedster produces desired results.
First, start off with:
1. General Settings
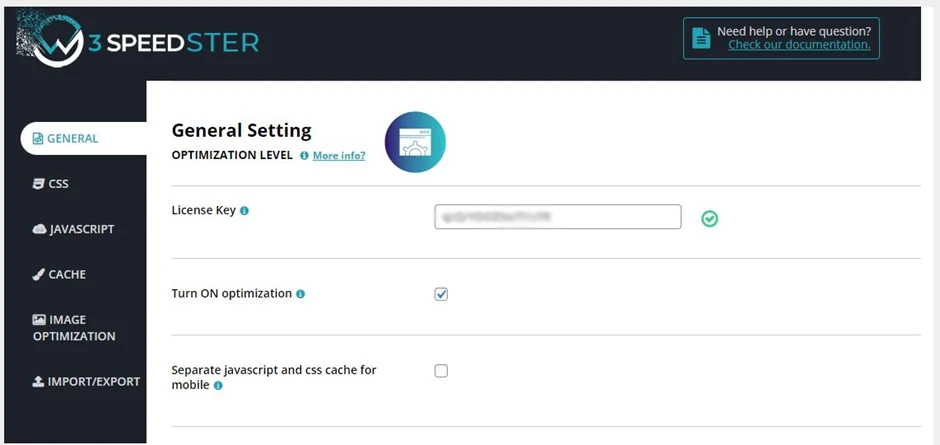
- LICENSE KEY:
Enter your unique License key in the box to access the licensed version of the plugin. All the plugin features are now activated & available to you to optimize website speed just by easy checking off configurations.
- CDN Integration:
If you are using any CDN service, you can integrate your CDN by the following steps:
Ø Fill the CDN URL box with your CDN’s URL
Ø Make sure the CDN URL must not contain a slash at the end.
CDN is a group of servers distributed around the world to deliver requested web pages to the user from their closely located server. This speeds up a website content delivery
- Enable Browser Caching
Our plugin can provide automatic browser caching to your site. Check off built-in enable leverage browsing cache feature to automatically activate browser caching.
By browser caching you can ensure to keep images, CSS, and JS stored locally by your browsers.
That way loading speed of your website will be improved as the user’s browser will download less data while navigating through your pages.
- Enable Gzip Compression
Gzip compression helps in optimizing HTML, CSS & JavaScript delivery by compressing the files before sending them to the browser.
With the use of the W3speedster wordpress plugin, you can get automatic functionality to enable Gzip Compression on your site.
- Remove Query Parameters
To remove query parameters from JS, CSS on your site, ensure to enable query parameters in the general settings of the plugin.
- Lazy Loading
Lazy loading is one of the most effective ways to speed up website loading time.
W3speedster Plugin comes with a built-in feature to lazy load images, iframe, video, & audio. Here you have an option to choose which files you want to lazy load by checking off.
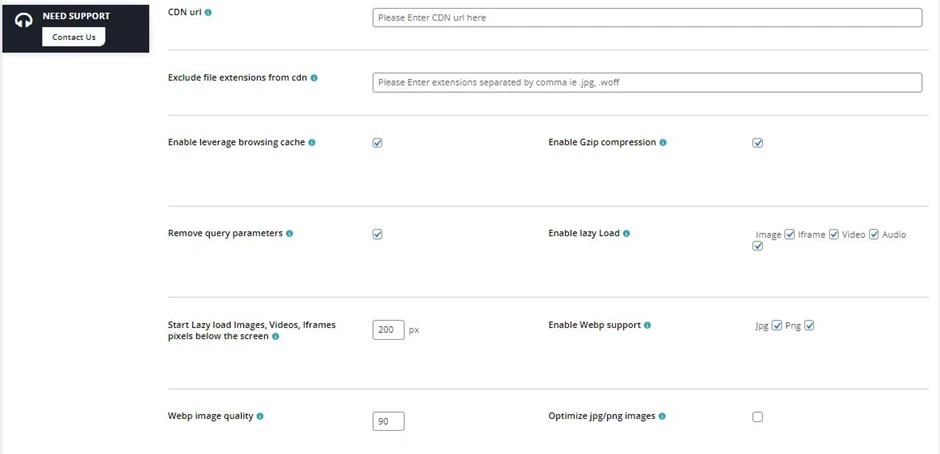
- Start Lazy Load Images, Videos, Iframes pixels below the screen
Set up lazy loading pixels at standard 200 px quality to keep the quality of your images intact & unscrewed.
- Enable WEBP Support
You can convert your images files formats (.jpg & .png) to WebP format with the help of the Plugin.
Since WebP image format is much smaller than other file formats, your web page will load faster.
- Set WebP Image Quality
By setting your WebP image quality at 90%, you will ensure to keep the quality of your images intact & unscrewed. However, you can change it according to your suitability.
- Optimize JPG/PNG Images
You can optimize JPG/PNG images with our W3speedster plugin. By optimizing website images, your website will load & open much faster.
- Optimize Images Via WP-Cron
This feature will optimize your images via wp-cron. WP-cron schedules image optimization and optimizes one attachment every minute only so as to ensure server performance does not get impacted.
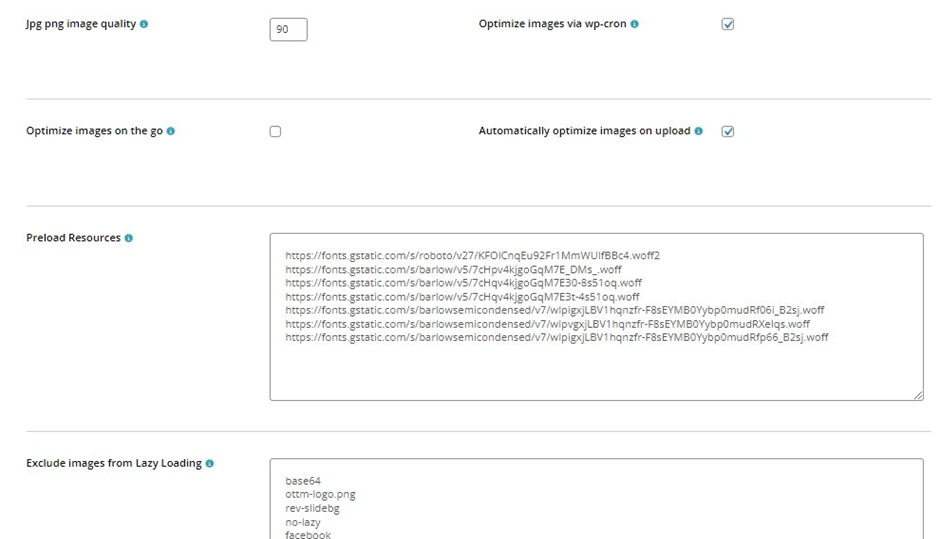
- Optimize Images on the go
Enable quick image optimization with this feature. By enabling this, the W3speedster plugin will automatically find and start optimizing unoptimized & unconverted images in the background once a web page is opened.
However, it is recommended to turn it off after a couple of days.
- Automatically Optimize Images on Upload
You can enable automatic optimization of images on upload to convert the image formats into WEBP format.
The individual setting to optimize the images and convert them to WebP should also be enabled.
- Preload Resources
W3speedster offers you a preloading feature to preload any resources like images, CSS, JS & fonts. All you need to do is to put the resource URL in the “Preload Resources” section.
On web page loading, only those resources will load first which are included in the section. Enter each URL in a separate line.
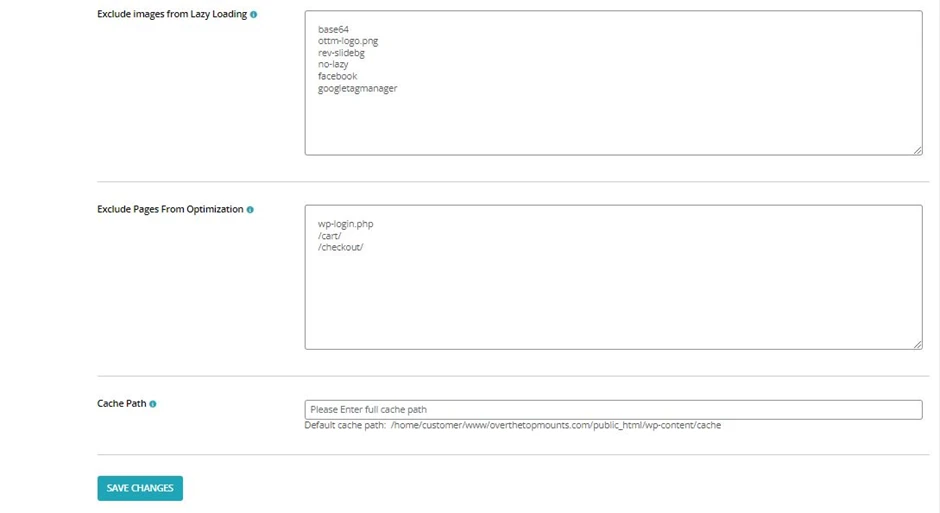
- Exclude Pages from Optimization
For all the pages you do not wish to optimize, you can exclude them by adding the page URL in this section.
Example: You can exclude the login page, cart page & checkout page.
Ø wp-login.php
Ø /cart/
Ø /checkout/
- Exclude Images from Lazy Loading
W3speedster has a unique feature for excluding images from lazy loading. If you don’t want some images to lazy load, you can add those in the section:
Ø base64,
Ø rev-slidebg,
Ø no lazy,
Ø facebook,
Ø googletagmanger,
- Cache Path
The cache of the W3Speedster Plugin has automatically generated insider the cache folder of WP Content Folder and if you wish to change the path you can change it by putting the full path in this section.
2. CSS Optimization:
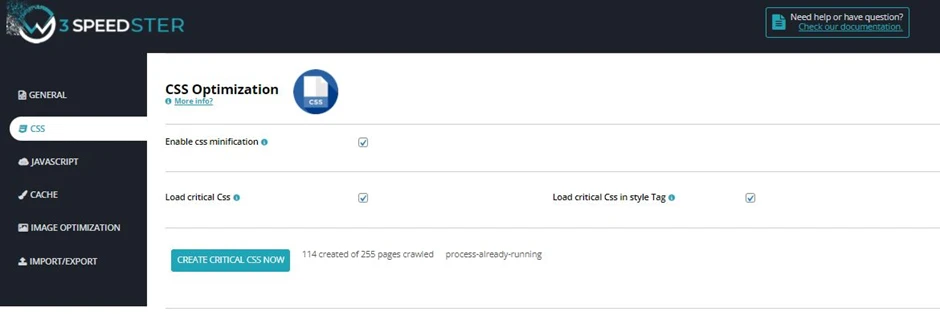
CSS optimization is the process of minimizing CSS files and codes for maximum speed. You can employ some of the best techniques to optimize your wordpress CSS with the help of W3speedster ranging from removing whitespace, comments, color values, and embedding code.
Here are the features you get in the plugin for CSS optimization.
- Enable CSS Minification:
CSS has an important role to boost your website speed. The larger the files will be, the longer time it will take to load.
The plugin comes with a feature to minify your CSS files. All you need to do is, check off CSS minification to enable a reduction in the size of CSS files.
Our plugin does deep CSS minification and removes white spaces, line breaks, comments, and block delimiters precisely. It will facilitate faster loading of the site.
- Exclude Link Tag CSS from Minification:
With the help of the W3speedster WordPress speed optimization plugin, you can exclude those pages which you don’t want to go through CSS minification and lazy loading.
It can be done by just putting the CSS URL in the box.
- Force Lazy Load Link Tag CSS:
For all the files that consume excessive data, with the help of the W3Speedster Plugin you can easily Force Lazy load those files, for instance (FontAwesome.CSS or Icon’s CSS).
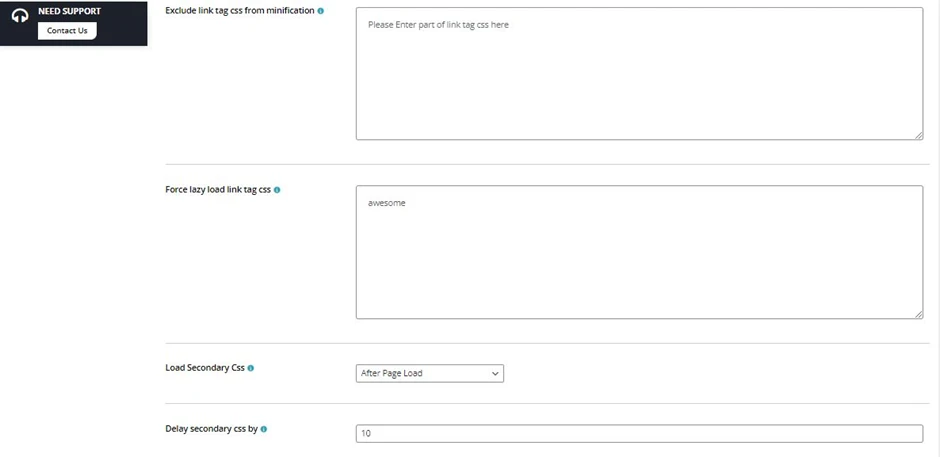
- Delay and Load Secondary CSS:
Enabling secondary CSS loading allows you to load all the minified CSS after page load. The plugin also allows you to set the delay timing of the secondary CSS loading. It is recommended to load secondary CSS with a 5-10 sec delay.
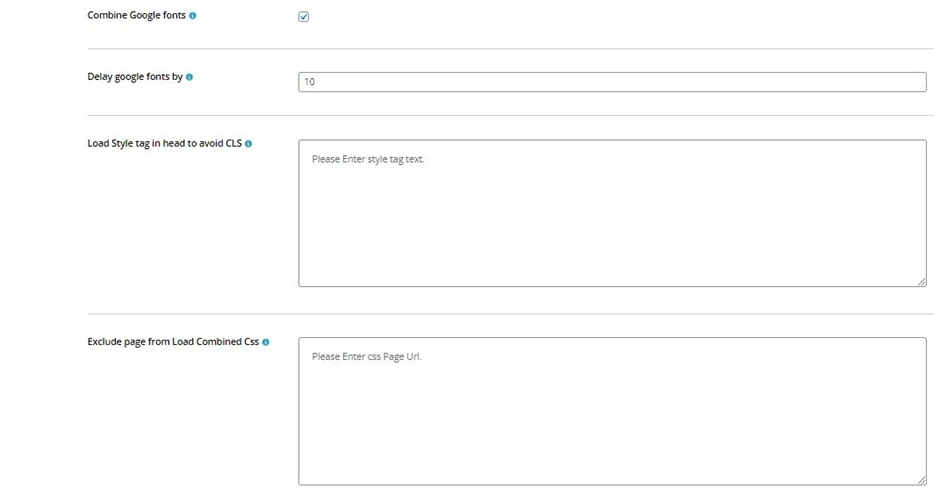
- Combine and delay Google Fonts:
You can further combine and load all the site google fonts with delay. Enter the number of seconds to Lazy load Google fonts. It is recommended to delay google fonts loading by 0.1 to 0.2 seconds.
- Load Style tag in head to avoid CLS:
W3speedster has an added feature to avoid CLS (cumulative layout shift) on your WordPress by loading style tag in head. All you will need to do is add the style tag text in the box.
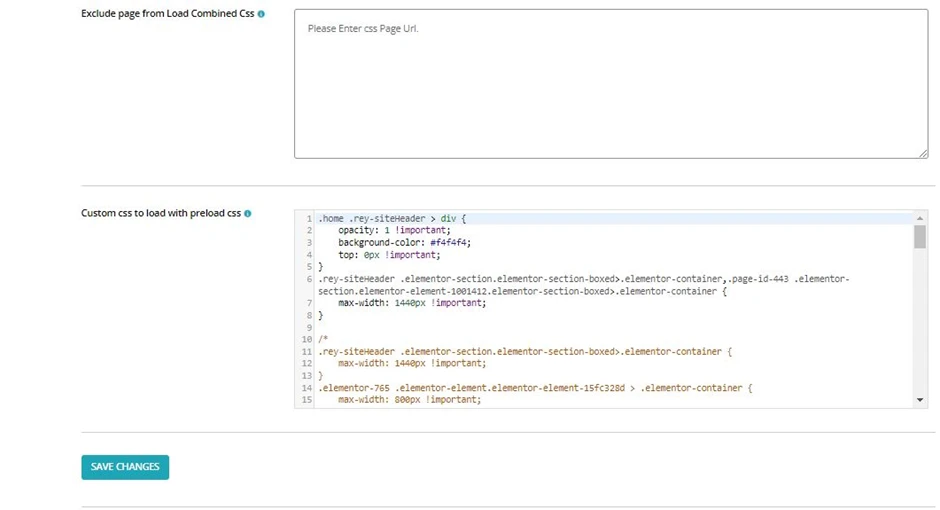
- Exclude Page from Load Combined CSS:
The plugin also allows you to exclude certain pages from combined CSS loading. Enter the url or part of the URL where you don’t want to implement CSS optimization. Make sure each url or part of the URL must be entered in a separate line.
- Custom CSS To load with preload CSS:
This section is made for the developers who want to add additional CSS to load with preload CSS. However, if you are not from a technical background, you can leave this section blank.
If you wish to preload any CSS, add in this section without a style tag. CSS Preloading ensures CSS files to be loaded when the page loads.
- Create and Load Critical CSS:
The W3Speedster Plugin can help you generate Critical CSS and load in a .css file. Creating critical CSS helps in CSS delivery optimization.
Once you create critical CSS, enable its loading.
At last, click on the save changes button to implement CSS optimization.
Sometimes, there are chances of getting errors while creating critical CSS. Plugin shows this error below ‘load critical css’ feature. Know more about ‘How to fix errors while generating critical css’.
3. JavaScript Optimization
JavaScript Optimization by W3speedster is the process of minifying JS, lazy loading JS, preloading custom JavaScript, and much more. Here is the step-by-step process to do it:
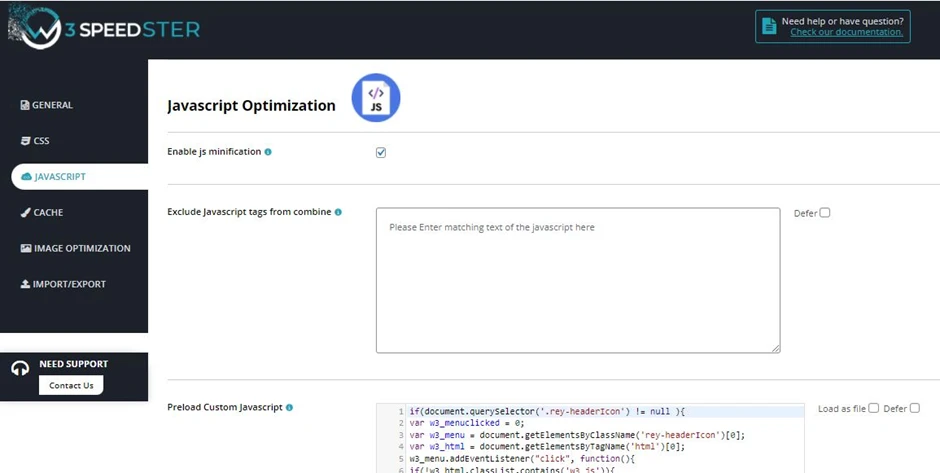
- Enable JavaScript Optimization:
The first step towards JS optimization is to enable minification.
Minification is the process of minimizing code and script files in your web pages. It’s one of the main methods used to reduce load times and bandwidth usage on WordPress websites.
- Exclude JavaScript Tags from Combine:
W3Speedster allows you to exclude JavaScript files of the pages you do not wish to Lazy Load and JS Minify by putting JS URL (eg: xyz.js) in the pertaining section. You can leave defer box unchecked.
- Preload Custom JavaScript:
Apart from deferring, you also get an option to choose files to preload by adding custom javascript. The plugin allows you to preload any JavaScript you wish by adding in this section without a script tag. However, this feature can only benefit developers who have a thorough knowledge of adding customized JS.
Preloading ensures the media file to be loaded when the page loads.
Don’t forget to enable Load as a file and defer once you enter the custom JavaScript. With this, JavaScript files that are allowed to load with page loading will get lazy-loaded.
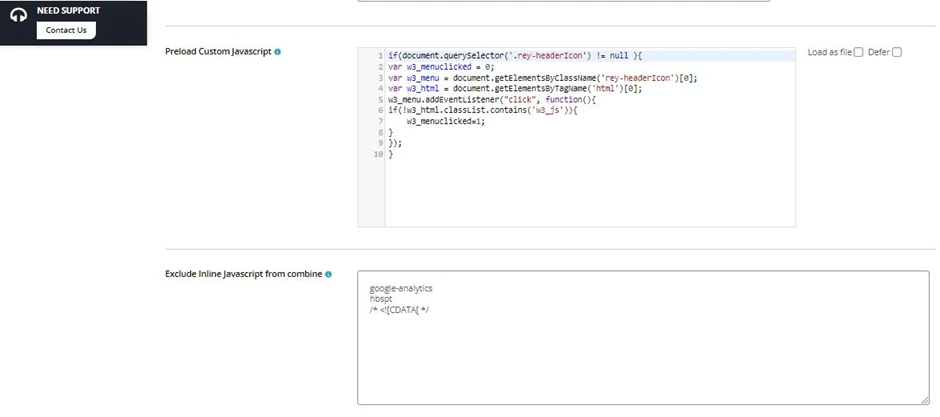
- Exclude inline JavaScript from combine:
Enter the script or part of the script url to exclude it from optimization. With recommended settings, the plugin will automatically fill the section with certain files.
Moreover, you can also add the “defer” attribute to the excluded files with a space. For eg. “jquery.min.js defer”. If you wish to not minify it then add “full” after a space. For eg. “jquery.min.js full”.
- Force Lazy Load JavaSript:
Put the specific word from the inline script tag, script URL, or part of the script URL to Force Lazy Load JavaScript which takes a lot of time to load (Eg. Facebook/Instagram).
- Load Combined JavaScript:
W3speedster plugin allows you to load minified and combined js on page load or after page load. It is recommended to use after page load to score better on google page speed insights or other speed tools. This will load all your minified javascript once the page loading will be completely done to make your web page load faster.
Be careful while enabling this option as it can also break your site. For best practice, use load combined JS in combination with ‘exclude javascript from optimization’ to keep a quality user experience when the page loads.
Moreover, the plugin has various hooks which can help you in customizing javascript minification and lazy loading features. Checkout the plugin documentation for more info.
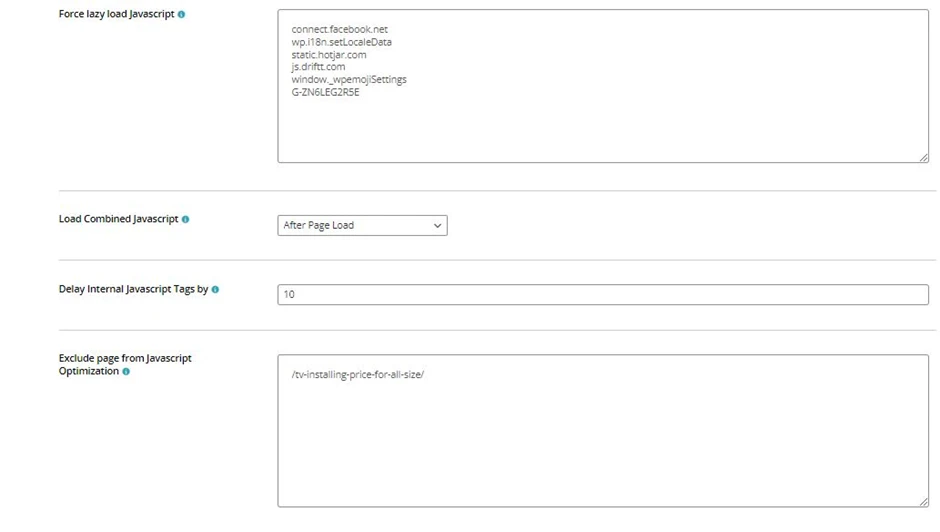
- Delay Internal Javascript Tags:
The next step is the delay of internal javascript tags by a few seconds. This option can be used when ‘after page load’ is selected in ‘Load combined JavaScript’. Enter the seconds in the box you wish to delay the load of combined and minified javascript. It is recommended to delay script tags by 10 seconds.
- Exclude Page from JavaScript Optimization:
With W3Speedster Plugin, you can easily exclude pages from JS Minification which you do not wish to Lazy Load and JS Minify by putting page script URL or part of the script URL.

Please enter each script url or part of the script url in a separate line.
- Custom JavaScript
You also have an option to add custom JavaScript in this section.
Save all the changes and updates. Remember, Custom JavaScript will load after all internal minified javascript is loaded.
4. Image Optimization
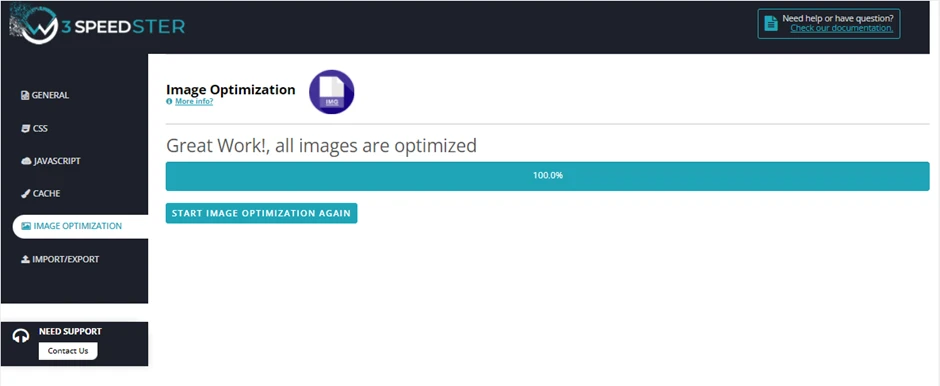
Image optimization is one of the important techniques to get a high page speed score. If you use lots of images on your WordPress, the plugin will help you optimize them. W3speedster has a unique feature of JPEG/PNG conversion to WebP image formats for better quality in a smaller size.
Make sure to enable all the image optimization functions mentioned in the general settings such as ‘optimize images via wp-cron’, ‘Enable WebP support, ‘Enable lazy load’ & more.
Once you have ensured all the settings, you are now ready to click on the start optimization button. While images are optimizing in the background, the percentage bar will show you the completion of the optimization process.
5. Clear Cache
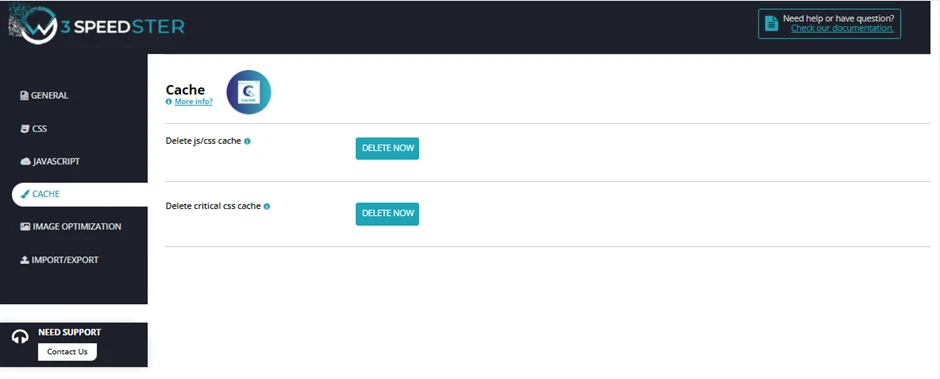
The cache saves the data of the last visited page in the browser. Thus, deleting the cache data helps you troubleshoot cache-related issues and increase the loading time of web pages and the performance of your website.
There are two types of cache you can clear from WordPress with the help of the plugin i.e., “Delete CSS/JS cache” and “Delete critical CSS cache” by clicking on the delete now button.
Click on “Delete CSS/JS cache” button, if you want to delete CSS & JS minified cache & files for all pages.
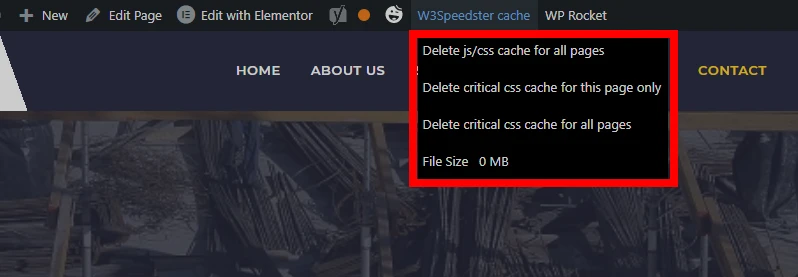
To delete Critical CSS Cache for a specific page, go to that page, hover on W3speedster cache in the top menu bar, and click on “delete critical CSS cache for this page only”. Make sure to click on “delete critical CSS cache for all pages” or “Delete Critical CSS cache” button in the plugin only if you’ve made any changes to web page design.
